Dye-Free Cake Decorating

Star Wars Angry Birds birthday cake with naturally dyed frosting.

For our family, the most challenging times to eat dye-free are holidays and birthdays.  We’ve been conditioned to think brighter is better.  More colors = more fun.  I think that’s the main reason people think our kids are missing out on “the fun of childhood” when we turn down artificially colored things.

But here’s one of the great things about kids – if it’s sweet, they think it’s a treat.  🙂

I LOOOOOOVE birthdays.  And holidays.  And basically any occasion for which you could throw a party and celebrate something with loved ones.  Decorating, baking, organizing, friends, family.  All the things I love!  Naturally, I had to figure out a way to continue to incorporate some colors into our celebratory foods.  Especially the kids’ birthday cakes.

I want to share with you my tried and true natural food dyes for frosting, fondant, and batter.  They’ll work on any of them. Keep in mind the colors will not be as bright as artificial colors, but I’ve never heard a complaint about the shade of these natural dyes.

This is the basic vanilla buttercream frosting recipe that I always use.  It’s quick, easy, and you can even make flavor variations like orange, almond, and cinnamon if that’s how you like to roll.

If you haven’t yet tried making marshmallow fondant, I highly recommend it.  It’s really not that hard.  Stacy, my sweet friend and owner of The Welch Cupcakery, has a great Marshmallow Fondant Tutorial.  She graciously walked me through the process before she had the tutorial. Check out her blog, and learn from the master.  She has tons of great tips on cake making.  🙂

Marshmallow fondants colored with raspberries, carrots, turmeric, and chocolate.

Prepared marshmallow fondants chilling in the fridge.  I love things you can do ahead of time!

Used the fondant to make Star Wars Angry Birds cupcake toppers for my son's birthday party.  Not too shabby for winging it.  :)

Used the fondant to make Star Wars Angry Birds cupcake toppers for my son’s birthday party. (Please don’t judge my artistic skills too harshly. The kids thought they were cool…)

List of Natural Food Dyes

RED/PINK – Raspberries or Beets.  (I think beets can leave a bit of an odd aftertaste, but some people don’t notice it.  Probably depends on how much you’re using, but I prefer raspberries.  You won’t get a deep red using these natural colorants, but you’ll get a pinkish red if you use a lot.  Use a little and you’ll get a nice light pink color – perfect for princess cakes!)

How to: Raspberries – Put a handful of fresh or thawed raspberries in some cheesecloth and squeeze the juice out into a bowl.  If you don’t have cheese cloth, you can squish your berries up in a bowl and stir in a little hot water, or heat the berries in some water in a saucepan on the stove.  Try to filter out any chunks of berry before adding it to frosting or fondant.  Beets – Same as raspberries.

ORANGE – Carrot Juice.  (Usually found with all the other health juices, like Naked Juice, Bolthouse Farms, etc.  Since it only comes in larger bottles, and I don’t care to drink it straight, I usually freeze what’s left in ice cube trays and store it for next time.)

How to: Pour it straight into your frosting/fondant/batter a little at a time until you reach the desired color.  Too much juice may make buttercream frosting a little chunky.

YELLOW – Turmeric.  (Found with the spices.)

How to: Sprinkle a little turmeric directly into your frosting/fondant/batter.  A little goes a long ways.  Too much will give it a strange aftertaste, so err on the “light” side.

GREEN – Avocado, Matcha Tea Powder, or Green Health Juice.  (Matcha can be expensive and vary in color. Yours doesn’t have to be the most expensive, but just make sure you’re not buying a brown one.  Or, obviously, your food won’t turn green.  Personally, I dug the avocado frosting I made, but my husband wasn’t a huge fan.  My favorite thing to use is Green Juice, like Naked Juice’s Green Machine.)

How to: Avocado – Smash it up until it’s a very smooth consistency, then add it a little at a time to whatever you’re coloring. I used about half an avocado to color a batch of buttercream frosting that covered about two dozen cupcakes.  Matcha – Add the powder directly into your frosting/fondant/batter.  It tasted a little like tea, but nobody seemed to mind it.  Green Juice – Pour it straight into frosting/fondant/batter.  Too much juice may make buttercream frosting a little chunky.

BLUERed Cabbage.

How to: Boil sliced up red cabbage leaves in some water for about 15 minutes.  Strain out the leaves, then let it boil down (reduce) until it is a syrupy consistency.  It will be purple, and you can use it as is for purple dye.  To make it blue add in tiny pinches of baking soda until it turns blue.  I’ve heard if you put in too much baking soda it’ll turn green, but I haven’t tried this myself (plus too much baking soda seems like it might taste weird).  You don’t need much of this syrup to make a good blue.  The rest can be frozen in ice cube trays and used another time.

PURPLE – Blueberries or Red Cabbage.

How to: Blueberries – Same as raspberries/beets under RED. Red Cabbage – See approach used in BLUE.

BROWN – Chocolate Powder.

How to: Stir chocolate powder into your frosting/fondant/batter a little at a time until you reach your desired shade of brown.  Don’t be afraid to go dark….there’s no such thing as too much chocolate.  😉

WHITE – Add nothing.  Buttercream frosting is off-white, and marshmallow fondant is bright white.

BLACK AND GRAY – Activated Charcoal Powder. (Sounds gross, but doesn’t really taste like anything.  And it is totally safe to eat.)

How to: Break open a capsule of Activated Charcoal and pour it into your frosting/fondant/batter a little at a time until you get your desired shade.


India Tree makes some great dye-free sprinkles.

India Tree makes some great dye-free sprinkles.

If you are looking for an easy way to add color, or maybe just a little extra flair, to your cakes you should try these dye-free sprinkles from India Tree.  We’ve had ours for two years now and still have about half a jar of each left. They seem kind of pricy at first, but they’ll last you a long time.  Some dye-free luxuries are worth it.  We use them on cupcakes, cakes, ice cream, and even our homemade yogurt.  Sprinklesssssss!

Have fun playing with your natural food colors!

Quick and Comforting: Crème Brûlée

Comfort foods.  We all have them.  And as long as it’s done in moderation, I am all about them.  I mean God gave us tastes buds for a reason.  If food’s sole purpose was nourishment, why make so many different tastes and aromas and textures?  Because He wanted us to ENJOY it!

Food can be an almost spiritual experience.  Our favorites can make even our worst days feel instantly better.  If I’m having a rough morning and you bring me a mocha or some cheesecake, we’re pretty much going to be BFFs for life.  That’s how food works for me. Let’s get real, that’s how food works for most of us.

comfort food quote

That’s why I’m going to share this ridiculously easy recipe for crème brûlée.  This along with bread pudding and homemade salsa are my husband’s favorite comfort foods.  If I know he’s having a bad day, I try to make sure he’s at least got a delicious dessert to look forward to after the kids go to bed.  One secret to a happy marriage: know your partner’s comfort foods.  Nothing builds relationships like the giving of tasty foods.  Okay, maybe there are a few other important things that help build relationships, but treat giving should definitely be on that list!  🙂

I wish I had known 20 years ago how quick and simple crème brûlée is to make.  Mind you the whole process takes a few hours, but the parts that involve you actually doing stuff  is only about 15 minutes all together.  I think we all have 15 minutes to devote to creating this indulgence.  Totally worth it, I promise!

Most of the store-bought crème brûlée mixes I’ve seen have caramel coloring in them (plus a lot of extra junk that is completely unnecessary).  It’s also not a whole lot faster.  So this is a dye-free version you can safely enjoy with the kids. If you feel like sharing with your kids…I’ll be honest, we usually don’t. We might be terrible parents.  Jury’s still out.

Anyway, sharing or not, all you need are these four ingredients: heavy cream, vanilla, egg yolks, and sugar.

creme brulee ingredients

This recipe is for two (because, like I said, it’s usually just for us), but can be easily doubled or tripled if you like.  Crème brûlée is an awesome dish to whip up for dinner guests.  It keeps well in the fridge for up to 4 days (just save the caramelizing step for when you’re ready to serve it).  So make it ahead of time and then impress the heck out of your friends with dessert.  They’ll love you for it.  You’ll love you for it.  Everybody wins.  Yay!  Now, on to the recipe.

First, preheat your oven to 325 degrees.

Bring a pint of heavy cream and a teaspoon of vanilla to a simmer in a saucepan over medium heat.  When it has just started bubbling (usually takes 6-7 minutes), remove it from the heat and allow it to cool down for around 10 minutes.  For the record, I do other things like dishes, dealing with kids, etc during these in-between waiting times.  It makes it feel like a quicker recipe when you’re not just standing at the stove waiting for stuff to happen.

simmer cream and vanilla creme brulee

While the cream is cooling, whisk together 3 egg yolks and 1/3 cup of sugar.  If you want to flavor your crème brûlée (with orange, lavender, lemon, cinnamon and so on) add what you want to this mixture now.  One of my favorite variations is chocolate; just mix in a half tablespoon of chocolate powder.

whisk yolks and sugar creme brulee

If you’re still waiting for your cream to cool, you can go ahead and prepare the ramekins and water bath.  Lightly grease a couple ramekins with coconut or olive oil (6 to 8 oz ramekins work well for two servings).  Place them in a glass baking dish, then fill the dish about half way up with hot water.  If you get it too full, it will be difficult not to spill as you move it in and out of the oven.  You want the water to be at least a third of the way up the side of the ramekins, like mine pictured below.

water bath creme brulee

Next, mix your cream and egg mixtures together, stirring until well blended.

mix cream and eggs creme brulee

Pour this mix into your prepared ramekins, and put the whole water bath in the oven.

water bath creme brulee

Bake it for about 40 minutes.  You want it to be set, but still a little jiggly in the middle.  When it’s done, take the water bath out of the oven.  Let the whole thing cool to room temperature (about an hour) before you remove the ramekins.  They look like this when they’re done.

cooked creme brulee

If you like your crème brûlée warm, then serve them now.  If you want it to really set up and chill properly, then cover the ramekins with saran wrap and stick them in the fridge for at least two hours (or overnight if you’re making it ahead of time).

That’s all there is to it if you want it plain (and yeah, sometimes we do, because we just can’t wait!).  But, after all, crème brûlée means “burned cream” – and it’s just not the same without that caramelized sugar to top it off.  Now, you can get all fancy and buy a mini blow torch or a tiny branding iron to do this part, or you can do it the not-cool way (like me) using the broiler in your oven.

Cover the surface of your crème brûlée with sugar.

sugar caramelize creme brulee

Stick it in the oven about six to eight inches away from the broiler.  It doesn’t take long for the sugar to caramelize, only two or three minutes.

broiler caramelize creme brulee

Keep a close eye on them, and turn the dishes if necessary so they caramelize evenly.  I doubt that truly “burned cream” tastes very good; so take them out when they start to look burned, don’t leave them in long enough to actually be burned.

caramelized sugar creme brulee

**Important note** If you had your ramekins in the fridge, let them warm up on the counter for at least 30 minutes before you put them under a broiler or they may crack.

comfort food creme brulee

There it is.  You worked hard for it (well, hard for like 15 minutes, right?).  Dig in!  You deserve it.  🙂

To Be Known Is To Be Loved: Why Christians Should Take Personality Tests

In Junior High I was obsessed with taking all those little quizzes in teen magazines. I think, like most crazy adolescents, I was desperate to create an identity for myself. Well, I must have done one too many What’s the best perfume for your personality? tests, because by the time I graduated from high school I thought personality profiling was a total joke.

I’d guess that’s probably how most people feel about it. That profiles are equivalent to those generalized horoscopes in the newspaper that could fit anyone if they really wanted it to. It’s totally understandable as there are a lot of poorly done personality tests and profiles out there. Many of them make people feel stereotyped in very negative ways. Introverts, for instance, are pegged as not liking other people, which is untrue. Or thinkers are perceived as unfeeling machines; also not true.

Labels can be very hurtful and off-putting. Nobody wants to be typecast, especially as something they are not. Probably explains why most people avoid taking personality tests in the first place. But I’ve come to see that personality tests can actually do the opposite. I believe if you truly understand your God-given personality, it is liberating. And furthermore, if you learn how to love other people for who they really are, it can free them too.

We all chain ourselves with fears. Fears that we are too different or needy or incompetent or unfeeling or inadequate or unlovable. Fear that who we are at our core is not how we should be. Love breaks those chains. We need to learn how to love the people in our lives as individuals. What better place to start than with understanding the way they were made to operate!

I’m speaking from a Christian point of view. I believe when God gave us LOVE as the greatest command, this is part of what he meant. We cannot truly love if we do not understand. Yes, we can do loving acts without full understanding.  There’s definitely a place for that.  But for people to know deep, changing, earth-moving love they need to be understood and accepted as they are.

tobeknownistobelovedkeller

Even if you do not hold the same beliefs as I do, I’m sure you can agree that the people you know have their own tendencies. Maybe your brother is really sensitive to criticism, and everyone knows they have to treat him with kid-gloves – “That’s just the way he is.” Or maybe your mother randomly breaks out into song at the grocery store – “That’s just the way she is.” Or perhaps that girl you work with just won’t stop talking and talking and talking – “That’s just the way she is.” Or maybe your son flies into a screaming, crying rage because he can’t get his boots on (like mine) – “That’s just the way he is.” I think you get the picture. People do weird, annoying things. But they’re mostly weird and annoying to us because we don’t understand why they’re doing them.

Let’s seek to understand.

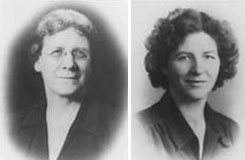
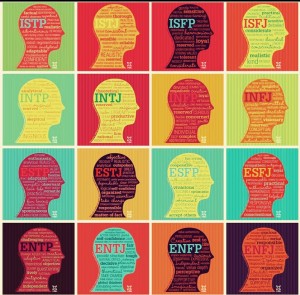
I’m sure most of you have heard of the Myers-Briggs test; it’s the one with all the letters, like INTJ or ESFP. This mother-daughter team, Myers & Briggs, compiled a list of questions aimed at identifying people’s four key personality characteristics based on the work of famous psychologist Carl Jung. They started working on it during World War II to help women entering the workforce for the first time identify what sort of jobs they would be good at. There’s your mini-history lesson for the day. 🙂

myersbriggs

In my research, I found the Myers-Briggs Type Indicator (MBTI) to be the most accurate both for myself and for the people in my family. Unfortunately, I also found that most MBTI personality tests are ridiculously easy to manipulate. That is, you can get the outcome you want instead of an accurate one. Usually this is done subconsciously, because people give answers for the way they would like to be instead of the way they are. In my experience, the most reliable results came from looking at each of the personality traits and deciding if it fit or not.

Even this can be confusing, because most people have a little bit of each trait in their personality. Therefore, it can be tricky to determine certain letters in areas where you are very moderate. I think things get muddled further because as adults we’ve learned (hopefully) socially acceptable behavior, and we’ve suppressed or changed ourselves to fit into our environments a little better. Sometimes it can be hard to tell what behaviors have been learned and what behaviors are our true selves.

But look at kids. They’re pretty straight forward. They haven’t learned to filter themselves yet. If you have children in your life you’ll know what I mean. When they’re mad, you know it. When they’re sad, you know it. When they’re excited, you know it. BUT those emotions play out differently for each child. With my kids, when J is mad he’s scowly and defiant. When Z is mad all hell breaks loose – he throws stuff, screams, growls, cries, stomps, etc. When J is sad he may shed a few tears and go off my himself. When Z is sad he weeps uncontrollably and gets very clingy. Any guesses who our extreme feeling child is? 🙂

Since it’s so obvious with children, let’s all think back to how we were as children. Doing that for myself unclouded the mystery that had been surrounding all this personality stuff in my mind. I found a book on child personality identification that has been extremely useful (with both kids and adults). It’s called Nurture by Nature: Understand Your Child’s Personality Type – And Become a Better Parent by Paul D. Tieger and Barbara Barron-Tieger.  Our local library had it, but I wound up buying a copy because it is an excellent reference book for parents. If you have kids, you should get it.

Here’s one of my favorite quotes from Nurture by Nature:

So many of the conflicts we experience with our children have little to do with what is happening, and everything to do with the way it is happening.  By insisting that our children do things the way we do them, we undermine their natural inclinations and communicate criticism rather than acceptance and approval.  Wherever possible, we ought to save the corrections for the big things and let the little things go.

I can’t overstate how helpful it has been as a parenting tool. It goes through the major stages of childhood (baby, preschool, school age, adolescence) for each personality type, and gives practical advice for helping your child through the challenges of each stage. It’s simple things like the most effective way to communicate with them, and the areas they are most likely to struggle in.  For me, this advice has also been helpful for learning how to relate better to adults of other personality types as well.

Nurture by Nature does an excellent job detailing each of the eight personality traits. I’ve tried to summarize each one for you.  Most of it is based on information I’ve gathered from different sources pertaining to children’s personalities. If you want some detailed examples, you should definitely check out the book. Have I said that enough times yet? 🙂 There are also some online resources that you may find helpful. My favorites are 16 Personalities and The Personality Page.

Alright, moving on to the good stuff: type determination.

There are four groups of extremes; each on a sliding scale.  You need to figure out which side of the scale you land on. When you’ve done this you’ll end up with a four letter type.

The trait groups are Introvert (I) – Extrovert (E), Sensing (S) – Intuitive (N), Thinking (T) – Feeling (F), and Judging (J) – Perceiving (P).  Don’t let the connotations you may have for words like “judging” sway you.  Try to read the descriptions objectively and decide which way you lean. Keep in mind that you’ll probably relate to descriptions from both extremes, but try to think about how you are in most situations.

I found it helpful to draw the little scales myself and mark where I thought each person in our family landed. But don’t feel pressured to do all the odd things I do… 🙂

Here we go!

Introvert or Extrovert: Which way is your energy typically directed?

I —————I————— E

Introverts: Energy is naturally directed inward toward own thoughts.  Feel energized after withdrawing from other people and thinking alone.  Drained by too much interaction, especially with large groups of people.  Prefer one-on-one playing with familiar people.  Usually reflect on information before speaking or acting.  Like to get thoughts out once they have been fully thought over.  More selective about activities that interest them, and are very passionate about their hobbies – they become “specialists” on a subject.  Tend to be perceived as shy or aloof in new situations, but really they just take longer to feel comfortable speaking up or joining in (like to wait and watch).

Extroverts: Energy is naturally directed toward other people or things.  Feel energized by being around other people.  Tend to get overexcited by too much interaction, and need to talk to someone to process it and calm down.  Usually louder children and vocalize/talk all the time.  Think while speaking, so can easily lose train of thought if interrupted or have to wait to speak (they are very frustrated by this and tend to interrupt other people so they don’t forget their own thoughts).  Don’t like to play alone for long.  May have behavior problems in school, because it is hard for them to sit still and be quiet for long periods of time (need interaction to stay focused).  Do first, reflect later – can appear very confident.  Jump into new situations; eager to play with anyone and often like being the center of attention.

Sensing or Intuitive: What do you naturally notice about the world?

S —————I————— N

Sensing: Learn primarily through the five senses.  Understanding of world is based on past experiences; need routines more than non-sensing children.  Like to have examples to follow in new situations or with unfamiliar projects.  Like to do things step-by-step, and work at a steady pace.  Excellent memory for details and facts.  Tend to be pickier eaters or have strong aversions/preferences regarding fabrics and smells.  Enjoy tactile stimulation: playing with water, mud, clay, sand, etc.  Have themed collections and/or a “lovey”.  Engaged by lots of action; bored by discussion of rules/ideas, just eager to start playing.  Prefer to play by the rules and/or use skills they’ve already mastered. Much more “in their body”.

Intuitive: Focus mostly on meanings and connections they perceive.  Like variety and learning new things; become bored quickly with routine/repetition.  Always looking toward the future – fantasize about the way things could be; less realistic sense of how things actually are (may be perceived as liars when ignore conflicts between fantasy and reality).  Don’t usually act in a step-by-step fashion.  Tend to be more imaginative, and are creative problem solvers.  Unconventional thinkers (may be frustrated/hurt if people are not enthusiastic about their ideas or say they are unrealistic).  Have eclectic “collections” of prized possessions (meaning behind the object is more important than object itself).  Make things up as they go along; love pretend play and making up new games (like discussing rules/ideas at length).  Prone to changing up the rules of a game.  Much more “in their head”.

Thinking or Feeling: How do you instinctively make decisions?

T—————I————— F

Thinking: Mainly consider unbiased information and logical consequences when making decisions (can still care immensely for people, just don’t base their decisions on their feelings or how it will make others feel).  Detached and analytical (step back and weigh pros and cons).  Tend to question rules to ensure they are fair and logical.  Do not like inconsistency.  Hate/do not accept “because I said so” answers.  Must respect someone before they can trust them. Highly value directness, clarity, dependability, competence, sincerity, and honesty.  May seem blunt, thoughtless, heartless, or selfish; struggle to have empathy.  Easily upset by unfairness; do not like favoritism.  Objective, assertive, and opinionated; will stand up to older people if challenged.  Generally not as good at expressing emotions; can appear to be cold or unaffected (though this is not true).  Usually like math and science best.  Enjoy competition.  Form opinions independently, and stick to their guns.

Feeling: Mainly consider how a decision will effect others or themselves, and if it feels right.  Personal and subjective.  Very upset if their decision results in another person’s unhappiness.  Have a strong desire to be liked; work hard to maintain harmony in relationships. Eager to be in contact with other people. Feeling loved and/or appreciated leads them to trust; usually admire and respect anyone they trust, even if not deserved.  Physical contact and affection are extremely important for their proper development.  Value kindness, tact, and gentleness.  Absorb tension from other people’s conflicts.  Easily upset by unkindness, raised or harsh voices, rejection, criticism, and confrontation.  Very empathetic; difficult for them to ignore other people’s problems.  Usually like humanities and social studies best.  Tend to be uncomfortable with competition.  Want to know/evaluate others’ opinions before they form their own; more susceptible to peer pressure.

Judging or Perceiving: How do you organize your world?

J —————I————— P

Judging: (This does not mean judgmental.) Very comfortable making decisions, and like when things are decided.  Prefer things to be structured, organized, and planned.  Uncomfortable with the vague and unknown.  Feel anxious when things are unsettled.  Don’t like many changes once plans have been made.  Transitions can be more difficult.  View time as fixed and inflexible; concerned with how much time they have to do something.  Usually don’t waste much time and try to be prompt (anxious when late).  Rules give comfort and security.  Tend to be compliant; may “police” others who are not following the rules.  Ordinarily respect authority and fall in line as children, and almost always rebel to some degree as teens.

Perceiving: More comfortable with the process of gathering information to make decisions than actually making the decisions.  Spontaneous, impulsive, and comfortable with the unexpected. Eager to explore.  Feel anxious when choices must be made; do not like eliminating options.  Frequently run out of time to make a decision and so avoid having to make it.  Overwhelmed by too many choices.  Live in the moment; very flexible.  View time as bendable, endless, and renewable; not concerned with timeliness or deadlines.  Always asking for “one more minute”.  May not be good at finishing what they started.  Resist limits, and constantly test them – see them as roadblocks to their explorations.  Question or forget rules.  Tend to think it is easier/better to ask for forgiveness rather than ask for permission.  Easy-going; somehow seem to get out of discipline either with good excuses or charm/humor.

That’s it.

What were your results?

There are 16 possible combinations of all the letters.  Hopefully you’ve been able to figure out a type for everyone in your family.  If you are still on the fence with a certain letter for someone, you can read the type descriptions you’re torn between (I like 16 Personalities type descriptions best) and decide which one is more fitting. Below, I’ve listed some titles given to each personality, for our family they all seemed very fitting.

16personalities mbti

ESTJ: Playing by the Rules. The Guardian. The Overseer.

ESTP: Look, Mom! No Hands! The Doer. The Persuader.

ESFJ: Let’s All Be Friends. The Caregiver. The Supporter.

ESFP: Social Butterflies. The Performer. The Entertainer.

ENTJ: Leader of the Band. The Executive. The Chief.

ENTP: Everything’s Negotiable. The Visionary. The Originator.

ENFJ: A Thousand Watts of Enthusiasm. The Giver. The Mentor.

ENFP: A Great Idea? I’ve Got a Million of ‘Em. The Inspirer. The Advocate.

ISTJ: Being a Kid Is Serious Business. The Duty Filler. The Examiner.

ISTP: Making Sense of Things. The Mechanic. The Craftsman.

ISFJ: A Promise Is a Promise. The Nurturer. The Defender.

ISFP: Gentle Free Spirits. The Artist. The Trend Setter.

INTJ: Creating Perfectionism. The Scientist. The Strategist.

INTP: Question Authority. The Thinker. The Engineer.

INFJ: My Secret Garden. The Protector. The Confidant.

INFP: Taking Everything to Heart. The Idealist. The Dreamer.

to be known is to be loved

Understanding personalities has changed our lives in many practical yet significant ways. Most importantly, it has enabled us to know and love each other more deeply.

God made us all different for a reason.  Every single person on this planet sees things from a unique perspective.  God designed it that way so we would grow to know him better by knowing each other.  Christ and the apostles all emphasized the importance of community.  One of my favorite hymns growing up had this refrain, “We are many parts. We are all one Body.  And the gifts we have, we were given to share. May the Spirit of Love make us one in deed.”  Let’s stop suppressing our God-given natures and abilities, and start sharing them and loving other people for sharing theirs.  Then watch how the world grows.

I’ll leave you with some words (pictured earlier in the post) to ponder as your mind continues to marinate in all this personality stuff:

To be loved but not known is comforting but superficial.  To be known and not loved is our greatest fear.  But to be fully known and truly loved is, well, a lot like being loved by God.  It is what we need more than anything.  It liberates us from pretense, humbles us out of our self-righteousness, and fortifies us for any difficulty life can throw at us.

Fabulously Fast French Toast Casserole

Ahhh, cinnamon.  We all know it smells amazing.  But did you know it’s really good for your brain too? Just a whiff has been shown to boost your memory, attention span, and visual-motor speed.  I don’t know about you, but after a long day with the kids I could sure use some help in those departments.  Truthfully, with an infant in the house, some days I need help all day.  We’ll sprinkle it in our coffee grounds or on our oatmeal in the morning to help us wake up.

And that’s just the smell.  Now if you actually eat cinnamon you get even more health benefits.  It has amazing anti-viral and anti-microbial properties (traditional Chinese medicine has long claimed ingesting cinnamon is one of the best ways to ward off a cold).  It also helps control your blood sugar levels by making the stomach empty more slowly after meals. That means your blood sugar won’t spike so dramatically; in fact, some studies have shown it to be more effective than certain diabetic medications.

Pretty neat stuff, that cinnamon.  Hey, want a quick little recipe you can just pack full of as much cinnamon as you can stand?  I got one.  We’ve been eating it weekly around here this winter.  It’s easy to throw together for dinner, and it’s fantastic for feeding a crowd at breakfast when you have house guests.  (P.S. Kids devour it!)

Alright, let’s get cookin’ on this delicious, dye-free, cinnamon-filled French toast casserole.

Preheat your oven to 375, grab a 9″x13″ baking dish, and gather your ingredients: bread, milk, eggs, butter, berries, vanilla, salt, sugar, and cinnamon.

ingredients

You’ll need somewhere between a third to half a loaf of bread.  Any bread will do.  French toast was originally developed for using up stale bread, which you can usually get super cheap at grocery stores and bakeries. (Midwest friends, Jimmy John’s day old bread is only 50 cents a loaf! Yum!)  I usually use whole wheat sandwich bread, because it’s what we have on hand.

Tear up your bread into roughly square inch large pieces.  Put the bread into your greased baking dish.  You want it to be full to the brim, but not much higher than that since it will puff up a bit while baking.

bread

Next, whisk 6 eggs with 2 cups of milk until well blended.  Stir in a 1/3 cup of sugar, 1 teaspoon of cinnamon (you can adjust this amount depending on how strong a taste you want), 1 teaspoon of vanilla, and 1/2 teaspoon of salt.

whisk

Pour your egg mixture over the bread.

pour

Now press the bread into the egg mixture (I use the side of a measuring cup or a spoon so my hands don’t get dirty).  You just want all the bread to be wet.

press

Let the bread soak in it’s little egg bath for at least 10 minutes.  While you’re waiting you can put on the topping.

Sprinkle a couple tablespoons of sugar and about two teaspoons of cinnamon evenly over the top of the casserole.

topping1

Then dot the whole thing with little pieces of butter.  If you use a spreadable butter for this (versus a stick of butter) it’s much easier.

topping2

Finally, shower on some berries.  Fresh or frozen.  Any kind you like.  They all work.  Or you can omit the berries.  Or use nuts instead.  Or use both berries and nuts.  Get crazy!

topping3

You can do all this the night before if you’re making it for breakfast.  Just make sure you let the dish sit out on the counter for at least half an hour, so it can warm up a bit before you throw it in the hot oven to bake.  Otherwise it may crack.

Once your oven is hot and your casserole has had adequate soaking time, pop it in the oven.  Let it cook for about 40 minutes.  It should puff up a couple inches above the brim of the dish, and the sides will be a nice golden brown when it’s done.

french toast casserole

golden edges

Serve it while it’s nice and hot.

french toast casserole 2

This dish smells SO good!  I’m salivating just thinking about it.  Plus, your house will smell wonderful and everyone in it will get a little brain boost to defeat that late afternoon drag.  Win-win-win.

A couple tips and tricks for my fellow busy mamas:

I try to get the egg mixture made and the bread torn up during nap time.  Just keep the egg part in the fridge until you’re ready to assemble the rest.  Saves some time.  You can even go ahead and make the whole thing during nap time and put it in the fridge until later.  As I said before, just remember to let your dish warm back up a little before you put it in the oven.

My favorite side for this dish (okay, for anything) is bacon.  What’s handy is I realized that if you bake your bacon on a foil lined baking sheet at 375, it is done in roughly the same amount of time as this casserole.  It was meant to be.  To cut out the nitrates in bacon, get an uncured kind.  I buy Farmland All Natural Uncured Bacon (Hy-Vee) and Simply Nature Applewood Smoked Uncured Bacon (Aldi’s).  Both are great….but is there really such a thing as bad bacon?

bacon

If you’re feeling especially nice and/or fancy, adding a little whipped cream is always a crowd pleaser around here.  I’d say I was doing it for the kids, but I’d be lying.  I’m pretty sure we want it more than they do!  🙂

french toast casserole whipped cream

Feeding the Kids: Easy Dye-Free Lunches

Other stay at home mamas will feel me on this one.  It’s 11:45 AM, you’re going about your morning doing all your usual mama stuff (folding laundry, wiping butts, splitting up fights, picking up toys, making appointments, feeding the baby, washing dishes, answering your 100th “why” question of the day, possibly even getting ready yourself).  Suddenly you’re bombarded with urgent cries of I’m hungry! When are we going to eat??

Yep, it’s lunch time.  How does it always sneak up on me like that?  I never have anything planned.  Shoot….  BUT, the beauty of going through all the work of creating a dye-free kitchen, is that anything I dig out and throw on a plate for the kids is going to be safe for them to eat.  Saves a lot of time and worry if you don’t want your kids to have food dyes.

If you’re new to dye-free living, hopefully this will give you some ideas.  You might notice that some of the things we eat for lunch overlap with my list of dye-free snack foods.  That’s because I’m literally just grabbing whatever we have on hand and putting it on a plate.  We have lots of snacky foods on hand.  🙂

Here’s a sample of what my kids have been eating the last couple weeks.

lunch

Turkey (Simply Nature uncured turkey from Aldi’s) and provolone with mayo, carrots and strawberries, Annie’s Chocolate Bunny Grahams, and almonds.

lunch

Turkey and salami (Hormel’s uncured hard salami), carrots, cherry tomatoes, a strawberry, ranch dressing (Marzetti organic ranch veggie dip from Hy-Vee – no MSG like most ranch), mixed nuts, and Simply Cheetos white cheddar puffs.  We also had some Greek yogurt on the side.  If you manage to arrange their food into a weird face or picture, even better.  My older boys are 5 and 3, and they think this is hilarious.  So if you want to impress your young ones…. 🙂

lunch

Hebrew National hot dog with ketchup (we use the Hunt’s brand without high fructose corn syrup), cherry tomatoes, a clementine, some pecans, and a handful of Parmesan Goldfish.  Again, we had Greek yogurt on the side as well.  (We go through a lot of yogurt!)

lunch

Turkey, Ritz crackers, almonds, carrots, blueberries, and some cottage cheese.

lunch

Peanut butter and jelly, salami (because they LOVE it and always ask for “just one piece!”), a clementine, cherry tomatoes, blueberries, and some Stauffer’s animal crackers.

lunch

Alright this lunch was from the weekend, which is why it’s a little (but not much) more time intensive than our other lunches.  🙂  Van de Kamp’s fish sticks, cantaloupe, mixed nuts, and a Nature Valley Oats N’ Dark Chocolate granola bar.

lunch

Peanut butter and jelly sandwich (yes, again…it’s easy!), a mozzarella cheese stick, a clementine, and a bunch of mixed nuts.

By now you’re probably getting the general pattern of what I throw on a plate for the boys.  Nuts, fruit/vegetables, a sandwich or some meat, usually something from the dairy group as well for protein.  They may not be fully balanced meals, but I think overall they’re healthy.  My kids also have a mid-morning snack with fruits and nuts and proteins, so their lunches aren’t usually huge.

lunch

This was our Valentine’s Day lunch.  A heart shaped Nutella and raspberry jelly sandwich, heart shaped bananas, strawberries, mozzarella cheese stick, almonds, a Fit & Active fruit strip (from Aldi’s), and some Brookside dark chocolate candies.

I don’t have a picture of it, but my kids really like having scrambled eggs for lunch.  It doesn’t take too long to cook some up.  So if you’ve had PB&J a few days in a row, you can always give eggs a try.  🙂

I know it’s nothing revolutionary, but I see that as a good thing.  Just more proof that going dye-free doesn’t have to be complicated.  Anyone can do it.

Dye-Free Discovery: Thai Soup

I just had to share this.  It was too good not to share.  I’m talking about Swanson 100% Natural Thai Ginger Broth.

I happened across this new dye-free convenience food while grabbing some beef stock for my French Dips the other day.  My husband lived in Thailand for a while, and is obsessed with the food.  So I had to give it a try.

I promise this is not an ad.  I am in no way affiliated with Swanson’s or Campbell’s.  🙂  I just genuinely LOVED this soup.  And it really is all-natural as advertised.  Check out the ingredients list for yourself.

ingredients

My husband, being the Thai food connoisseur of our household, was a bit skeptical that it would taste authentic.  We tried it tonight.  He gave it a big thumbs up.

Even the kids liked it, though they complained that it “hurt their tongues” a little at first.  It was spicier than most other foods I make, but I wouldn’t categorize it as spicy.  Had just the right amount of heat to it.  They still ate it, and even said they liked it afterwards.  So good job, Campbell’s.

It was also really easy to prepare.  I happened to have all the ingredients on-hand, so that worked out nicely.  Plus it was an excellent way to use my leftover shredded chicken.

ingredients

Took about 20 minutes altogether to prepare.

Sorry for the slightly blurry picture. Oops...

Sorry for the slightly blurry picture. Oops…

Here it is in all it’s delicious goodness.  Mmmmmm…I can still smell it.

thai soup

If you’re not in the mood for soup, you can use this broth to make other recipes too.  The Campbell’s Swanson website has more recipes.  Apparently, they also make two other flavors: Mexican Tortilla, and Chinese Hot and Sour.  Looking forward to trying those.

If you like Thai food, give this one a try.  It made a great dye-free dinner for us.  🙂

The Easiest Chicken You’ll Ever Make

Seriously, I can’t imagine cooking chicken being any easier than this.  I feel like it hardly qualifies to be called a recipe; it’s only two ingredients. The best part is you can use the meat in lots of different meals.  And, of course, it’s dye free.

Let’s get to it.  Gather your ingredients: a bag of frozen chicken and some salsa.  We usually do three pounds of chicken and use a 16 oz jar of salsa (all the salsas I’ve seen are dye free, but always double check).  I’ve also done only two chicken breasts with a 1/3 cup of salsa in a tiny crock pot and it works just fine.  Tailor it to your needs.  I, personally, love having leftover meat to quickly throw into a dish later in the week, so I make a lot at once.

ingredients

Get out your crock pot.  Pour in the frozen chicken.

frozen chicken

Now cover the chicken with the salsa.

addsalsa

Put the lid back on and set your slow cooker for however long you want.  I’ve done it on high for 4-6 hours and on low for 8-10.  Everything turns out the same.  Time it so it will be done cooking a little before you want to eat.  I threw this together at 9:00 AM, so I did 8 hours since we usually eat around 5:30 PM.  But I’ve also started it at 1:00 PM and cooked it on high for 4 hours and it was perfectly done in time for dinner.  Don’t be afraid to try it at the faster cooking time.

I won’t lie to you.  This doesn’t look extremely appetizing while it’s cooking.  After a couple hours it’ll look like this.

cooking

It does smell pretty good though.  So trust that and just try not to look at it until it’s done.  🙂

When your chicken is done cooking, it’ll look like this.  Still looks a little weird, but hang in there things are about to get pretty.

donechicken

Now get out a bowl and a couple forks.  You’re going to shred your meat directly into the serving bowl, because why make extra dishes?

serving bowl

Use the forks to carefully transfer a couple chicken breasts to the serving dish.  I usually scrape the chunks of salsa off ours a little while it’s still in the slow cooker, but you don’t have to.

movechicken

Now use your forks to pull the meat apart.  When the chicken is warm it shreds easily.  I shred all of mine and then store any leftovers in the fridge for later.  It’s not as fast to shred it once it’s been refrigerated.

shredded

That’s it!  Use your shredded chicken however you’d like.  The first night I usually make chicken tacos – set out some fixin’s and tortillas and you’re good to go.  I like making pasta dishes or sandwiches with what’s leftover later in the week.

The meat has a really nice flavor, but you can also spice it to your taste as it’s cooking.  For example, if you want to make ALL of it into taco meat, you could add a package of taco seasoning (a safe, dye-free option is McCormick) along with the salsa and then cook it.  If you make three pounds of chicken taco meat, you can easily feed a large group.  It’s great for a quick dinner when you’re having company, but have tons of other things to do (like clean your house, take care of the kids, etc).

Here’s a glimpse at the delicious chicken tacos we had for dinner last night.  Taco nights are the best, because the kids eat so fast.  No complaining, no stalling; just the beautiful sounds of chewing.  I hope you enjoy it as much as we do!

chicken tacos

Kid Approved Dye-Free Snacks

When we cut out food dyes, I wasn’t sure what the heck I was going to feed the kids.  Especially for snack time.  My boys are big snackers (as am I!), so it was kind of an important thing to figure out.  Obviously, whole foods like fruits, vegetables, eggs, and plain meats (i.e., not spiced/marinated/processed – otherwise not guaranteed to be color free) are going to be dye-free.  These foods probably make up the majority of what we eat these days. However, we do eat our share of convenience foods as well.

As much as I love to cook, the reality is I don’t have the time or the energy or the desire to make from-scratch food all the time.  I purposely choose not to.  I like knowing that I could, so I’ll try various from-scratch recipes from time to time.  I think self-sufficiency is important.  But I love that we live in an age where I don’t have to make everything if I don’t want to.  It’s one less thing to worry about doing every day; convenience foods save sooooo much time.  More power to you if you make all your food all the time.  I respect and admire that.  But I’m guessing that most of you out there are probably eating some amount of convenience foods. Unfortunately for you and me, a lot of those foods are going to have artificial colors and other junk in them.

While this isn’t by any means an exhaustive list of dye-free snack options, it’s a good place to start gathering ideas. If you have any favorites you’d like to share, please leave a comment so we can all benefit from the collective knowledge.

Please note that dye-free is not my only criteria for choosing snacks.  I won’t buy items with artificial preservatives (TBHQ/BHT/BHA), artificial sweeteners (aspartame, sucralose), MSG, olestra, nitrates/nitrites, sulfites, or potassium bromate.  I try to avoid trans fats too; but it gets tricky because companies can legally label something “0 grams of trans fats” when, in fact, it only contains less than 0.5 grams.  That means it could have up to 0.49 grams of trans fats per serving, and that can quickly add up to surpass the suggested daily limit of 1-2 grams.  A general rule of thumb for avoiding trans fats is to steer clear of partially hydrogenated oils.  If you’re interested in why I won’t buy these things, I’ll link to some helpful articles at the bottom of this page.

FYI, this list is just based off what’s in my kitchen right now and what I can remember buying other times.  I’ll update it if I remember more or find new favorites.

Crackers and Granola Bars

Kashi Granola Bars

Nature Valley Granola Bars (Oats ‘N Dark Chocolate, Peanut Butter, and Greek Yogurt Protein; haven’t checked other flavors)

Millville (Aldi’s)  Protein Chewy Bar (Dark Chocolate Peanut Butter; haven’t checked other flavors)

Buttery Round Crackers (Ritz brand and Savoritz brand [Aldi’s])

Stauffer’s ORIGINAL Animal Crackers (not the ones with frosting)

Honeymaid Angry Birds Graham Crackers (My boys are OBSESSED with Angry Birds, so these are fantastic!)

Teddy Grahams crackers (Honey and Chocolate Chip are safe; haven’t checked other flavors.)

Annie’s Bunny Grahams (any flavor is safe)

Annie’s Whole Wheat Bunny Crackers (all other flavors have annatto)

Parmesan Goldfish Crackers (all other flavors have annatto; parmesan is the green bag)

Market Pantry (Target) Peanut Butter Sandwich Crackers

———-

candy

Candy

UNREAL candies (“unjunked” versions of M&M’s, Peanut M&M’s, Milky Ways, and Peanut Butter Cups)

True North Almond Pecan Cashew Clusters

Mott’s Medleys fruit snacks

Simply Nature (Aldi’s) fruit snacks

Fit & Active (Aldi’s) All Natural Fruit Strips

Simply Balanced (Target) Fruit Strips

YummyEarth Organic Lollipops

Chocolate chips (Plain chocolate chips and white chocolate chips have been safe in every brand I’ve checked; however, peanut butter and butterscotch usually have caramel coloring.)

Black Forest Gummy Worms (Hy-Vee carries them)

Caramels (Lovely Candy Co. brand, and Werther’s Originals)

Darrell Lea Liquorice (Target carries it)

Chocolate Bars and Candies (If it is just chocolate [no fillings, flavors, coating] it’s probably fine. We like organic dark chocolate bars in our house. So good! Dove originals, Brookside chocolates, and Hershey’s originals are all good.)

———-

Cookies

Vanilla wafers (Aldi’s Benton’s brand, and Nilla brand)

Oreos (the seasonal ones with colored frosting are not ok)

Pillsbury Simply refrigerated cookie dough – all flavors

Keebler Simply Made Cookies – all flavors

———-

chips

Chips

Clancey’s (Aldi’s) Sweet Potato Chips  (These are my favorite snack.  I’m eating them right nowThey’re incredible! Plus 14 chips count as a serving of vegetables…I doubt it’s the best kind of vegetable serving a person could have, but it justifies my addiction.)  🙂

Corn Tortilla Chips (All the brands I’ve seen have been safe, but watch for trans fats.)

Clancy’s (Aldi’s) Kettle Chips Mesquite Barbecue flavor

Cheetos Simply White Cheddar

Ruffles Simply Sea Salted Potato Chips

———-

Cereals – We lean towards eating cereals with lots of protein and good nutrition to actually fill you up.  All of these are less than $3/box; nothing crazy expensive here.  🙂

Cheerios (original and honey nut are safe, others have colors)

Kashi (anything I’ve ever seen by their brand is safe and super healthy)

Post Grape Nuts

Cascadian Farm Oats and Honey Granola

Archer Farms French Vanilla Almond Crunch Granola

Nature’s Path Coconut Chia Granola

Simply Nature (Aldi’s) Fruit Muesli, and Toasted Oats

Nature’s Best Blue Pom Wheatfuls

**BEWARE of TBHQ and BHT as preservatives in cereals.  It’s very common.  Also extremely annoying because even within a brand some cereals will have it and some won’t.  Always check!**

———-

Frozen Desserts

Blue Bunny All Natural Vanilla ice cream

Breyer’s All Natural (Chocolate, Vanilla, and Strawberry flavors)

Belmont’s (Aldi’s) – any flavor

Simply Nature (Aldi’s) Popsicles

———-

other

Other

Nuts – any plain or salted nuts should be fine

Dried fruits (Generally safe, but keep an eye on the preservatives used.)

Hy-Vee brand Unsweetened Applesauce

Hy-Vee brand Marshmallows (Not sure about other generic brands, but the name brand Jet Puffed marshmallows have blue dye in them.)

Mozzarella Cheese Sticks (Hy-Vee brand, Kraft, and Happy Farms [Aldi’s] have all been fine)

Wholly Guacamole (We usually make our own guac, but this is nice when you don’t have time or if avocados are out of season/expensive.)

Salsa – most kinds are safe (This is my husband’s favorite snack.  Give him some chips and some Mad Butcher’s Salsa, and he is a happy man.)

Pretzels (Most plain, bagged pretzels should be safe.)

Popping Corn (not the bagged stuff, just the seeds that you pop on your stovetop at home)

Joy brand Waffle Bowls (fun for special desserts)

Yogurt (We make our own Greek Yogurt, but most brands will have some dye-free options.  I know Chobani, Dannon, and Yoplait do.  Yogurts branded towards kids probably will have artificial colors though.)

———-

Links to information on other bad food additives:

Center for Science in the Public Interest (CSPI) has a very helpful list describing all food additives.

Australia’s Northern Allergy Center also has a full list of food additives and any harmful effects.

A BusinessWeek article from 1996 shows that the dangers of food additives have been known or questioned for quite some time.

Hungry For Change has a succinct list of their top 10 food additives to avoid.

How Probiotics Fixed My Colicky Baby

I’m writing this for all the other mamas (and papas) out there with screaming babies.  The ones who are going crazy from sleep deprivation and frayed nerves.  The ones who stay up all night comforting a wailing baby to no avail.  The ones wander the grocery stores at night like zombies because they still hear the echoes of screams in their heads. The ones whose arms feel like they’re going to fall off and whose backs ache from sleeping in crazy positions with the baby, because it was the only way.  The ones who cry desperately with their crying child.

Maybe this is you right now.  Maybe this will be you in four months or in four years when you have a new child in your life.  This was me three years ago with our second son, Z.  I’m pretty convinced that those nine sleepless, stressful, cry-filled months permanently damaged my brain.  I’m not really even sure how, but it definitely feels like things don’t work quite as well as they used to upstairs.  The experience also left me with some PTSD (post traumatic stress disorder).  Whenever I’d hear him crying, even though the colicky phase was over, my heart would sink and race at the same time.  Initially, it was even hard to shake that feeling with our third child!  If you know the feeling, you have my deepest sympathy.

It’s a terrible thing to endure.  I used to joke that it would be an effective form of torture.  But seriously, I think it might be.  That’s why I’d like to share what finally fixed Z; to help end the torture of colic.  The answer was so simple: probiotics.  I still find it hard not to resent the doctors who told us it was a phase we had to wait out, and that Z was just a “difficult” baby.  I wish someone had suggested probiotics to us sooner, so I could have those lost months of my life back.  But what’s done is done. Hopefully what I learned through this experience can help other parents and their babies.

This is our story:

Z didn’t have classic colic; i.e., inconsolable crying 3 hours a day, 3 times a week, from when baby is 3 weeks to 3 months old.  He screamed and cried almost all day, every day….for NINE months.  He rarely slept for more than 40 minutes at a time.  This made him overtired, so he’d only be awake and semi-happy for about half an hour before he’d start crying again.  It was a viscous cycle. Nobody knew what to “label” his condition; I’m still not sure.  His pediatrician called it colic for lack of a better word. So we stuck with that.

At first we thought Z was just fussier than most babies.  After a couple weeks of very little sleep and lots of scream-crying, we thought he might be sick.  I had noticed some white stuff inside his mouth and wasn’t sure what it was.  I called the doctor’s office.  I described the problem to the nurse, who told me it was probably thrush (a type of yeast infection) and had the doctor send a prescription to our pharmacy.  We were desperate to help him feel better, so we gave him the medicine.  Looking back, giving a young baby such harsh drugs, especially without a proper diagnosis, was a colossal mistake.  I genuinely regret it.

Whenever you take antibiotics it kills all the bacteria in your system; it doesn’t distinguish between good and bad.  Our bodies need those good bacteria!  (Side note: Ladies, if you’ve ever taken antibiotics and then immediately gotten a yeast infection, this is why.  It messes with your natural balance.)  Eating yogurt with active cultures or taking probiotics replenishes the good bacteria your digestive tract needs to function properly.  There are a plethora of studies out there demonstrating the many, varied health benefits of probiotics: helping with diarrhea/Chron’s/IBS, improving digestive function, enhancing your immune system, etc.  We take them daily any time we feel sick.  The Harvard Medical School’s article on the health benefits of probiotics has more information, as does the probiotics page on National Institutes of Health (NIH) website.

Back to colic.  My guess is that Z had an underdeveloped intestinal tract.  Not uncommon in infants, particularly in those born earlier.  All of my boys came out naturally 3 weeks early; that’s just what my body does.  His early-ish birth may have predisposed him to some fussiness, but after he took the medicine for thrush (which destroyed any good bacteria he did have in his gut) Z’s fussy behavior quickly turned into completely inconsolable shrieking and wailing.  Giving him that medicine is probably one of my biggest regrets.

Months went by with Z only getting worse.  I did anything and everything I could to try to get him some sleep.  I remember one of the best ways to do that was to lay down with him, his head propped up on my shoulder and facing me.  He would scream and cry and thrash for anywhere from 15 minutes to an hour.  But if I held him close and shushed in his ear, he would eventually fall asleep (or I’d give up).  My arm would always fall asleep, and my shoulders to this day still haven’t fully recovered.

I did it because I’m a firm believer in the importance of sleep for good brain development.  My favorite book on kid sleep is Healthy Sleep Habits, Happy Child by Dr. Marc Weissbluth.  He has a section of the book devoted to colicky children and ways to help them.  There’s even a plan for sleep training those kids once the colicky phase ends when baby is about three to four months old.  Z didn’t fall into this camp.  We tried to train him thinking maybe the phase was ending, but it was torture for all of us.  He seemed like he was suffering.  So we gave up and just did what we needed to do to survive.

When Z was about nine months old, a doula friend of ours asked if we’d ever tried giving him probiotics.  (P.S. Doulas are amazing! I hope to be one when my kids are older and my time is more flexible.  Look into hiring a doula if you’re pregnant.)  We didn’t know much about probiotics, so we read a bunch of articles and research and couldn’t find any negatives.  We figured it might help and wouldn’t hurt, so why not?  Within a few DAYS of giving Z probiotics, he was like a new child.  He started taking naps and he wasn’t fussy all the time.  The endless hours of crying and screaming rapidly tapered off.  The next week we tried sleep training again.  He was sleeping 11-12 hours straight at night (no feedings!) and was napping for a total of five hours during the day.  It felt like a MIRACLE!  I can’t even begin to describe how incredible it felt to sleep for eight glorious, uninterrupted hours again.  It was life changing!

With our third son, L,  I wasn’t taking any chances.  I started giving him probiotics the day he was born.  I also ate a lot of Greek yogurt with active cultures, because I read that the probiotics in it could pass through breast milk to the baby.  Every little bit helps.  So far, L has been the healthiest baby we’ve ever produced.  🙂

pill

The most common question I’ve been asked about all this is how to administer the probiotics.  All you have to do is twist open one of the capsules to get at the probiotic powder.  Then carefully pour about 1/3 of it onto the baby’s tongue right before they nurse (save the rest for later). The milk will quickly wash it all down.  I’ve also heard of other women putting the powder directly on their nipples and then having baby nurse, or mixing the powder in with expressed milk and giving it to the baby in a bottle.  Whatever way you choose.  Just be sure to check the probiotics to see if they need to be refrigerated once they’ve been opened.  Some do and some don’t.

Also, it seems that recent research is suggesting probiotics are much less effective on formula-fed babies.  NPR’s article about probiotics being used to treat colic gives more details if you’re interested.  Something to keep in mind if you’re not breastfeeding or not planning to breastfeed.  For whatever reason, this treatment may not work for your child.

I encourage everyone to give their babies/children/selves probiotics.  While I don’t think it’s a cure-all, it’s certainly not going to hurt to try it.  It won’t even cost much; about $10-$15 per box, or as I like to say, less than a co-pay.  🙂  It’s well worth the potential health benefits in my opinion.  You can find probiotics in every grocery and big box store, they’re usually kept near the diarrhea and gas medicines.  If it’s hard to get to the store with your colicky baby (which I totally empathize with), you can buy probiotics on Amazon and have it sent to your front door.  I know you’re probably skeptical, just like we were, but please read the research for yourself and don’t be afraid to try it.  It might spare you a screaming baby.